Objective
Mark & Share the Workflow & Status of each Content/Colorway for effective collaboration.
Details
1) Workflow vs. Status
| Workflow | Status |
|
Can create custom names in Company Settings Available to be edited by Admin / Collaborator / Editor Synced with Line Sheet | |
|
|
[New Content Page]
- Workflow
- Status
[Legacy Content Page]
- Workflow / Status
💡 Notes
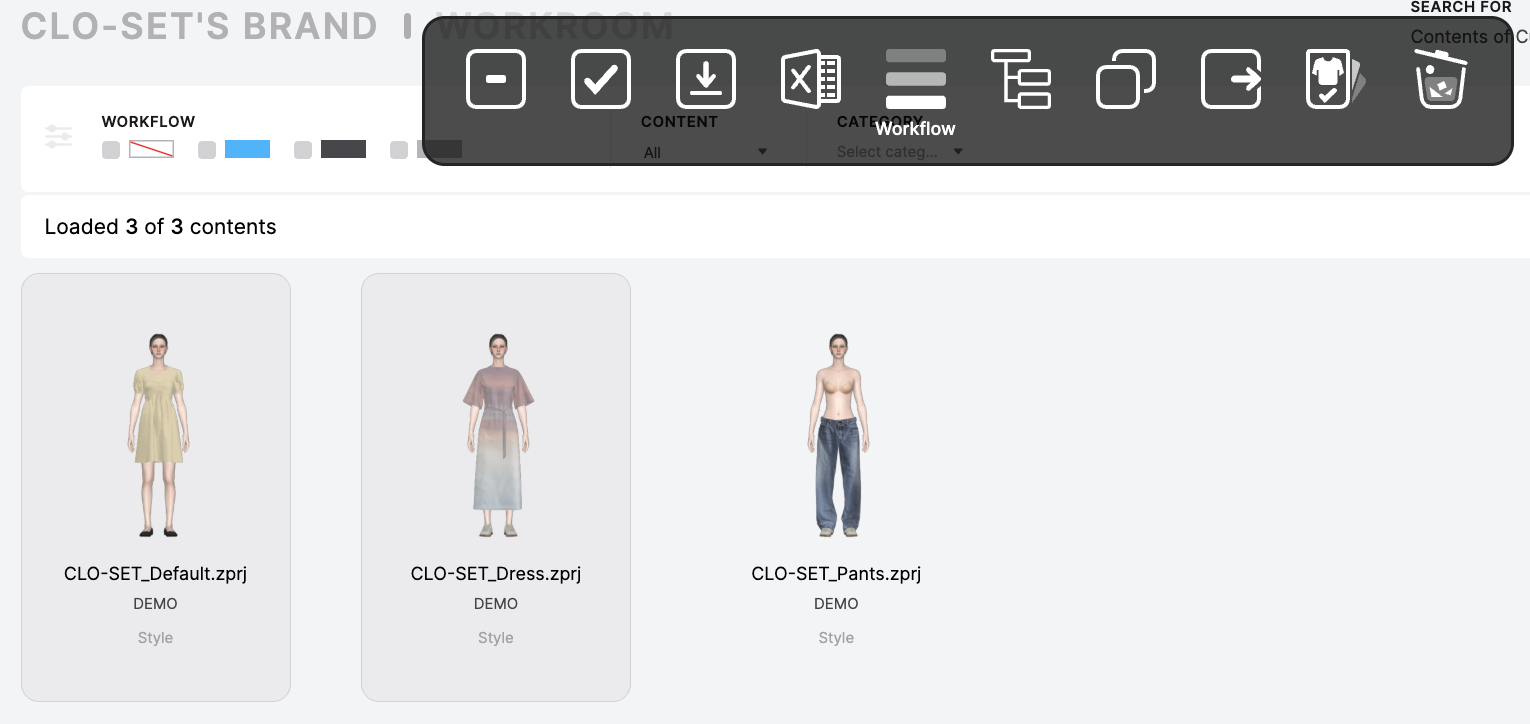
Multi-select Workflow Change
1. Go to your Workroom
2. Select the contents you wish to change (multi select content: ctrl/cmd + left mouse button)
3. Click 'Workflow' on the floating menu
4. Select the Workflow you want to update your contents to
5. Click 'OK' and you should see the new Workflow setting applied to the selected contents.
2) Company Setting
Workflow and Status names can be managed in Company Setting. Please note that this can only be done by Company Admin and above. If you do not have the permission, please reach out to your Admin.
2-1) Workflow Setting
- Enter your Company > Click 'SETTING' on the top left corner
- Choose 'CONTENT' to start creating custom names of workflow
- Click "Set Leadtime End Status" button to select the end status, which should be considered as the final steps in the workflow. (This setting can maximize the accuracy of the workflow leadtime on each step)
2-2) Status Setting
- Choose 'LINESHEET > STATUS' to start creating custom names
3) Filter using Workflow
In your Workroom, you can Filter the view using the Workflow status. Simply select the color chip you'd like to view.
4) in Line Sheet
In Line Sheet List Mode, you can view the Workflow of each Content, as well as the Status for each Colorway. Changing the Workflow/Status will be reflected on the Content Page, and vice versa.